📦 Migration to Material Component
🌟 Overview
Welcome to the official Material Components guide. This documentation is designed to assist you with two separate processes:
Technical Migration: Transitioning from the legacy components (using the google- prefix) to the new, optimized architecture (using the material- prefix).
Version Upgrade: Moving from the Free version to the Paid (PRO) version, unlocking advanced features, exclusive widgets, and deeper customization options.
🚀 Migrate from Google Cards to Material Cards
If you are using the old Google component in your Lovelace dashboards, you will need to update your configuration to the new Material Cards version.
This guide will walk you through the process step by step.
🔹 Step 1 – Open the Lovelace Dashboard
- Go to the dashboard where your Google component cards are already added.
- Click the menu (three dots in the top right corner).
- Select Edit Dashboard → Raw Configuration Editor (or Editor di configurazione testuale).
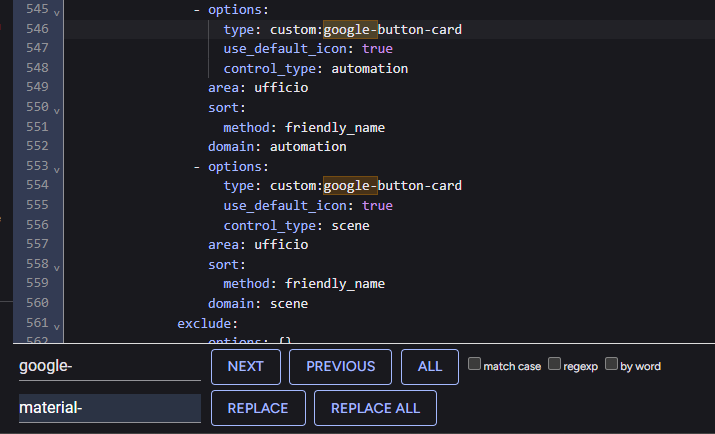
🔹 Step 2 – Search and Replace
Open the search function in your editor: press Ctrl + F (or Cmd + F on macOS).
Search for all instances of:
google-Replace them with:
material-This will rename your old component identifiers to the new Material Cards naming convention.
NOTE
📸 Example: In the attached screenshot, you can see how google-button-card should be renamed to material-button-card.
🔹 Step 3 – Save and Refresh
- After updating all entries, click Save in the Raw Configuration Editor.
- Refresh the dashboard to apply the changes.
- Verify that all cards are functioning correctly with the new Material Cards.
⚠️ Notes
- Make sure to only replace component names, not entity IDs or other configuration parameters.
- The new Material Cards support additional features like Material Dialogs and Material Media, so you may want to explore those for enhanced functionality.